 how-to
How to Eliminate Wi-Fi Dead Zones: A Step-by-Step Guide
Table of Contents
- Diagnose Where Wi-Fi Dead Zones Occur
- Best Router Placement for Whole-Home Wi-Fi Coverage
- Optimize Your Router Settings to Eliminate Dead Zones
- Wi-Fi Extender vs. Mesh Wi-Fi: Which Solution Works Best
- Install a Wired Access Point for Reliable Coverage
- Verify Your Fix: Test Coverage and Speed
- Common Mistakes to Avoid When Fixing Wi-Fi Dead Zones
- Frequently Asked Questions
Last Updated: October 14, 2026
Diagnose Where Wi-Fi Dead Zones Occur
To eliminate Wi-Fi dead zones, first find them: walk your property with a phone or laptop and note where signal drops.
Walk Your Property and Measure Signal Strength
Check signal strength in each room via your device's Wi-Fi settings, or use a free Wi-Fi analyzer app that shows dBm: stronger signals sit closer to 0, weaker ones drop toward -80 or lower.
Walk every room, hallway, and outdoor area you need covered, and sketch where signal is strong and where it weakens. Watch for:
- Bedrooms far from your router
- Basements and upper floors
- Outdoor spaces like patios or garages
This map shows where to focus: a dead zone where you work matters more than one you never use.
Identify Physical Obstructions and Interference Sources
Wi-Fi signals weaken with each barrier; concrete, metal, and brick block faster than drywall.
Check what's between your router and the dead zones:
- Walls and floors, count how many separate walls the signal must pass through
- Metal objects, filing cabinets, refrigerators, metal shelving, and pipes weaken signals significantly
- Large furniture, bookcases and upholstered pieces absorb signal
Also check neighboring networks in your analyzer: a crowded channel means nearby networks fight for the same airtime, slowing everything down.
Best Router Placement for Whole-Home Wi-Fi Coverage
Router placement determines whether you get whole-home coverage or scattered dead zones, and the convenient corner is usually wrong.
Position Your Router in a Central, Elevated Location
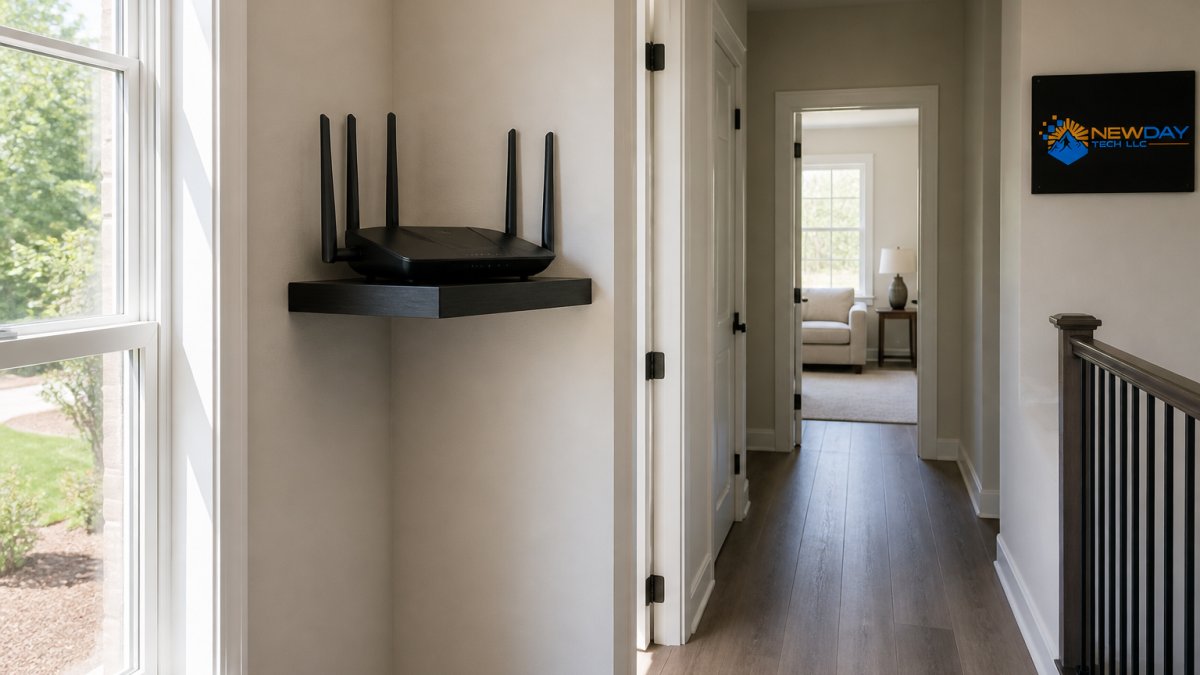
The best router placement for whole-home Wi-Fi coverage is high and central. A corner router broadcasts half its signal into walls and outside; a central router reaches more of your home.
Routers work best when:
- Positioned in the center of your home, not corners
- Elevated at least 4-6 feet high, on a shelf, mounted to a wall, or on a stand
- Away from the floor where signals get absorbed by furniture and carpet
In a long, narrow home, place the router in the middle, not at one end. In a two-story home, put it on the first floor as high as possible.
Minimize Walls, Metal Objects, and Interference
Keep your router away from metal and interference sources. Microwaves and cordless phones run on 2.4 GHz, so a nearby microwave causes interference when it runs.
Move metal objects away from your router:
- Metal shelving or filing cabinets nearby
- Aluminum foil or metal ducting
- Refrigerators positioned too close
These objects reflect and absorb signals. Even a few feet of distance helps. If your router sits on a metal desk, move it to a wooden shelf or wall mount instead.
Optimize Your Router Settings to Eliminate Dead Zones
Before buying new equipment, optimize what you have. Many routers ship with defaults that don't match your home or your neighbors' networks, free improvement lives in these settings.
Choose the Right Wi-Fi Channel and Frequency Band
Your router broadcasts on channels within frequency bands: 2.4 GHz offers more range but slower speeds, 5 GHz faster speeds but shorter range.
On 5 GHz and 6 GHz, channels are wider and don't overlap the same way, so the analyzer's recommendation is usually fine, but those signals fade faster through walls.
For dead zones at the edge of coverage, use 2.4 GHz, it penetrates walls better. Near the router where you need speed, use 5 GHz or 6 GHz.
Band Steering, Channel Width, and Wi-Fi Generations
Three settings do more for real-world coverage than most people realize:
- Band steering. This lets the router advertise one network name and push each device to the band that suits it, 5 GHz or 6 GHz for nearby devices that need speed, 2.4 GHz for distant ones that need reach. Turn it on if your router offers it. Without it, devices often stay on 2.4 GHz long after they've moved close enough to benefit from 5 GHz.
- Channel width. Wider channels carry more data but are more likely to overlap with neighbors. On 2.4 GHz, use 20 MHz, 40 MHz on that band almost always causes interference. On 5 GHz, 80 MHz is a reasonable default; drop to 40 MHz if your analyzer shows heavy congestion. On 6 GHz, 160 MHz is often usable because the band is less crowded.
- Wi-Fi generation. Wi-Fi 5 (802.11ac) runs on 5 GHz only. Wi-Fi 6 (802.11ax) and Wi-Fi 6E add 6 GHz and handle many devices at once far better. Wi-Fi 7 (802.11be) adds wider channels and multi-link operation. A newer router doesn't extend range by itself, but it handles a crowded home, dozens of devices, neighbors on every channel, with less slowdown. If your router is Wi-Fi 4 (802.11n) or older, replacing it is often more effective than adding an extender.
Your router's admin panel lets you change channels, band steering, and channel width. Log in to wireless settings; some routers auto-select these, others let you choose manually. If unsure, use a Wi-Fi analyzer to test which option gives the strongest signal in your dead zones.
The Crowded-Apartment Case
In an apartment, condo, or townhouse, dead zones may have nothing to do with distance. Count the networks your analyzer sees, in a dense building, dozens compete for the same 2.4 GHz airtime.
The symptoms of congestion look different from the symptoms of distance:
- Strong signal bars but slow speeds, especially in the evening
- Speeds that drop when neighbors are home and recover when they're not
- Video calls that stutter even when you're standing near the router
If that matches, the fix isn't an extender, move as many devices as possible to 5 GHz or 6 GHz, narrow your 2.4 GHz channel width to 20 MHz, and pick the least-used of channels 1, 6, and 11.
Update Firmware and Reboot Your Equipment
Router manufacturers release firmware updates that improve performance and fix bugs; old firmware may not handle modern devices well and can lack band-steering and security fixes.
Reboot your router regularly: unplug it for 30 seconds, then plug it back in.
Also reboot your modem if you have one, a slow modem means slow Wi-Fi everywhere. Unplug it, wait 30 seconds, and plug it back in.
Wi-Fi Extender vs. Mesh Wi-Fi: Which Solution Works Best
Once you've repositioned the router and tuned its settings, remaining dead zones come down to one question: what do you add? Extenders, repeaters, access points, and mesh systems solve different problems at different costs.
The Four Options, Side by Side
| Option | How it works | Speed in the extended area | Wiring needed | Best for |
|---|---|---|---|---|
| Repeater / extender | Receives your router's signal, rebroadcasts it | Roughly half the throughput, because it talks to the router and your device on the same radio | None | One or two isolated weak spots, light use |
| Wired access point | Connects to the router by Ethernet and broadcasts its own signal | Full router speed, no halving | Ethernet run to the location | A single distant room or floor where you can run cable |
| Mesh system, wireless backhaul | Nodes relay to each other over Wi-Fi and present one network name | Good, but each wireless hop costs throughput | None | Scattered dead zones, multiple floors, no cabling |
| Mesh system, wired backhaul | Nodes connect by Ethernet or coax/MoCA and present one network name | Full speed at every node | Ethernet to each node | Whole-home coverage where you can wire the nodes |
A repeater and an extender are the same device under two names. What matters is whether the backhaul, the link back to your router, is wired or wireless. Wired backhaul is faster and more stable; wireless is easier to install.
When a Repeater or Extender Is Enough
A repeater makes sense when the problem and budget are both small:
- One or two dead zones, not a whole floor
- Browsing, email, and standard-definition streaming in the extended area
- No practical way to run cable
Place the repeater roughly halfway between the router and the dead zone, where it still receives a strong signal. Too close adds nothing; too far rebroadcasts a weak signal. Putting it inside the dead zone itself is a common mistake, the signal it receives is already too degraded.
When Mesh Makes Sense
Mesh earns its higher price when the problem is the whole home, not one room:
- Dead zones are scattered across multiple rooms or floors
- You want one network name and seamless roaming instead of manually switching between networks
- You need consistent speeds, not just a signal bar that looks full
Mesh systems manage roaming for you: your device moves between nodes, and a well-designed mesh hands off without dropping a call or video stream. A router plus a mismatched extender often leaves devices clinging to the weaker signal because the two boxes don't coordinate.
The Wired-Backhaul Rule
Whichever system you choose, wired backhaul is the single biggest upgrade. If you can run Ethernet, or use existing coax with a MoCA adapter, connect each mesh node or access point back to the router by cable.
If you can't run cable everywhere, wire the nodes you can reach and let the rest use wireless backhaul.
Install a Wired Access Point for Reliable Coverage
For the best performance without replacing your whole router, add a wired access point.
Run Ethernet Cable and Position Your Access Point
An access point connects to your router via Ethernet and broadcasts the same network, covering distant areas without speed loss.
Run Ethernet from your router to where you need coverage, through walls, attics, or along baseboards.
Position the access point centrally in the area it covers, using the same rules as your router: elevated, central, away from metal and interference.
Configure Your Access Point for Seamless Roaming
Set your access point to the same network name (SSID) and password as your main router, so devices see one network and roam automatically.
In the access point's admin panel, match:
- Same SSID (network name)
- Same password
- Same frequency band (2.4 GHz or 5 GHz)
Some access points auto-configure this; others need manual setup. Check your model's instructions.
Verify Your Fix: Test Coverage and Speed
After making changes, test whether coverage improved using a speed test app and signal-strength measurements in your dead zones.
Run speed tests in the previously weak areas and compare to earlier measurements.
Test at different times of day, interference changes when neighbors or appliances are active, so a spot may be strong in the morning and weak at night.
Common Mistakes to Avoid When Fixing Wi-Fi Dead Zones
Most people make the same errors when trying to eliminate Wi-Fi dead zones.
Don't hide your router in a cabinet or closet.
Don't place your router on the floor. Signals travel upward and outward.
Don't buy expensive equipment before diagnosing the problem.
Don't expect one extender to cover a large dead zone.
Don't forget about interference.
Frequently Asked Questions
What causes Wi-Fi dead zones in my home?
Wi-Fi dead zones form when physical obstructions block your wireless signal. Walls, especially those with metal studs or plumbing, reduce coverage significantly. Large appliances like microwaves and refrigerators emit interference on the same 2.4 GHz frequency your router uses. Distance from the router, floor levels, and interference from neighboring networks also create weak-signal areas. Trees, metal fencing, and dense landscaping cause dead zones on properties with outdoor coverage needs.
How do I find Wi-Fi dead zones in my home before fixing them?
Use your smartphone's Wi-Fi analyzer app to measure signal strength (measured in dBm) as you walk through your property. Signals stronger than -67 dBm are strong; -67 to -70 dBm are acceptable; below -70 dBm indicates a dead zone. Note which rooms show weak bars, then map these areas on paper. Check if dead zones align with thick walls, metal objects, or distance from your router. This diagnostic step prevents buying unnecessary equipment and identifies the actual problem.
Is a mesh Wi-Fi system better than a Wi-Fi extender for eliminating dead zones?
Mesh systems work better for whole-home coverage but cost more. Mesh nodes communicate wirelessly with each other and your router, providing seamless roaming as you move between nodes. Wi-Fi extenders are cheaper and simpler to install but can reduce speeds by 50% since they use the same channel to receive and broadcast. For large homes or properties with many dead zones, mesh is worth the investment. For a single weak spot, an extender or wired access point solves the problem affordably.
Can I eliminate dead zones without buying new equipment?
Yes, often. Reposition your router to a central, elevated location away from walls and metal objects. Change your Wi-Fi channel if neighbors' networks are causing interference, use a Wi-Fi analyzer to find the least congested channel. Update your router's firmware and reboot it. Reduce obstructions by moving the router higher or clearing furniture nearby. These no-cost or low-cost steps eliminate many dead zones. If weak coverage persists after optimizing placement and settings, then consider an extender, access point, or mesh system.