 how-to
Remote Security Monitoring for Lake Houses: 7 Steps
Table of Contents
- Step 1: Assess Your Lake House Security Needs and Internet Connectivity
- Step 2: Choose Security Cameras Without Wi-Fi Dependency
- Step 3: Plan Outdoor Security Camera Placement for Maximum Coverage
- Step 4: Install a Security Camera System With Cellular Backup
- Step 5: Set Up Security System Power Backup and Protection
- Step 6: Configure Remote Monitoring and Video Storage
- Step 7: Test, Commission, and Establish Maintenance Routines
- Frequently Asked Questions
Last Updated: October 21, 2026
Step 1: Assess Your Lake House Security Needs and Internet Connectivity
Remote security monitoring for lake houses starts with knowing what you're protecting and how you'll stay connected. Before buying a camera, know your internet situation.
Here's what to assess first:
- Check your actual internet speed and reliability (run a speed test multiple times over a week)
- Identify dead zones where signal drops completely
- Map your property boundaries and note structures that block signal
Slow or spotty connectivity kills remote security monitoring for lake houses, if your connection drops regularly, even the best cameras won't help.
NewDay Tech specializes in rural property connectivity, with installations on remote ranches and lake properties where standard solutions fail.
Document your property layout, buildings, large trees, power sources, before choosing camera locations or planning cable runs. This becomes your installation blueprint.
Step 2: Choose Security Cameras Without Wi-Fi Dependency
Wireless cameras sound convenient but aren't reliable for remote lake properties, Wi-Fi drops, trees interfere, distance kills the signal.
IP cameras over ethernet are the standard for serious installations.
Consider these camera types:
- Fixed turret cameras: Wide field of view, weather-sealed, simple mounting
- Bullet cameras: Long-range zoom, good for covering distance, visible deterrent
- Dome cameras: Compact, weatherproof, less obvious
Resolution matters.
Low-light performance separates good cameras from frustrating ones. Lake properties have shadows. Trees block sun.
NewDay Tech selects cameras built for outdoor durability and rural deployment, avoiding consumer-grade equipment that fails in harsh conditions.
Step 3: Plan Outdoor Security Camera Placement for Maximum Coverage
Camera placement makes or breaks your security system.
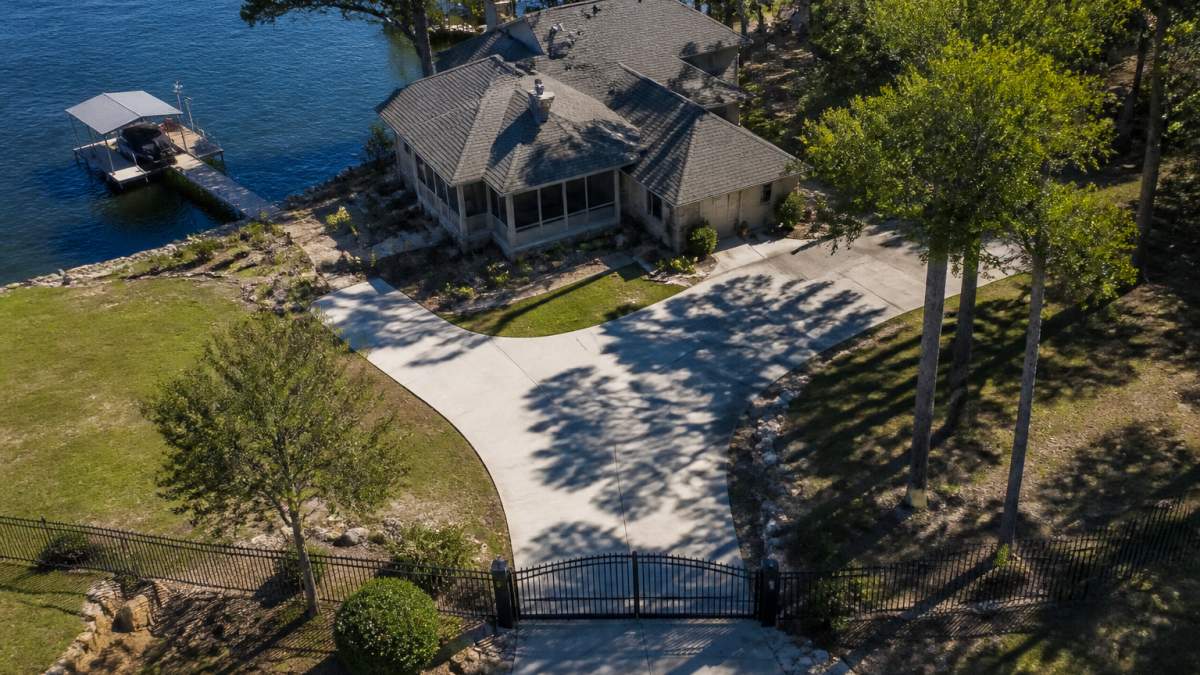
Start with entry points, gates, dock, driveway, side paths, windows.
Mounting height and angle matter. Higher mounting covers more ground, and angling slightly downward captures faces.
Avoid these common mistakes:
- Pointing cameras into bright light (sun, reflected water)
- Mounting too close to trees that will grow and block the view
- Placing cameras where they're easy to disable or cover
Overlap your coverage, two cameras seeing the same area from different angles.
Seasonal changes matter at lake properties: winter trees lose leaves, summer growth blocks views.
Step 4: Install a Security Camera System With Cellular Backup
Installation divides into three parts, mounting hardware, cable routing, and network configuration, and most problems happen when these steps skip important details.
Mounting requires the right hardware for your surface: anchors for brick, self-tapping screws for metal, lag bolts for wood.
Cabling is where DIY installations usually fail.
Run cables in the most direct path possible, longer runs mean signal loss, and runs over 300 feet need higher-quality cable or repeaters.
Network configuration connects your cameras to your recorder and your phone. This requires:
- IP address assignment for each camera
- Port forwarding on your router (if using internet access)
- VPN setup for secure remote viewing
This is where many installations break.
Step 5: Set Up Security System Power Backup and Protection
Power is the quiet failure mode of remote monitoring. A storm takes out the grid, the recorder reboots, the cameras come back but the network switch doesn't, and you discover the gap weeks later. Lake properties see more lightning, tree-limb outages, and longer restoration times than suburban addresses, so power design deserves the same rigor as camera placement.
Calculate your actual load
You can't size backup without knowing what you're backing up. Add up the running wattage of every device that must stay alive:
- NVR or recorder: typically 30-60 W depending on drive count
- PoE switch: roughly 15 W plus the power drawn by each camera (PoE cameras commonly draw 6-12 W each)
- Router and modem or cellular gateway: 10-25 W combined
A four-camera system with a recorder, PoE switch, and network gear commonly lands in the 100-150 W range. That number drives everything else.
Match the UPS type to the job
Three classes matter here:
- Standby (offline) UPS. Cheapest, switches to battery after a brief transfer. Fine for a router or a single camera, marginal for a recorder that dislikes dirty transfers.
- Line-interactive UPS. Regulates voltage and handles brownouts and surges without draining the battery. This is the right default for a security head-end at a storm-prone property.
- Online (double-conversion) UPS. Continuously conditions power through the battery. Best protection, highest cost and heat. Usually overkill unless you have sensitive networking gear or frequent, deep sags.
Runtime is not linear with load: a UPS rated for 10 minutes at full load may run 45-60 minutes at a quarter load. Read the runtime curve at your actual wattage, for a 100-150 W load, a mid-size line-interactive unit commonly delivers 30-90 minutes; 4-8 hours requires a larger unit or external battery pack.
Protect against surges and lightning
Surge protection is layered, and each layer does a different job:
- Service-entrance protection. A whole-home surge protective device at the panel diverts large surges before they reach branch circuits. Have a licensed electrician install it.
- Point-of-use protection. A quality surge strip at the security head-end catches what gets past the panel.
- Signal-line protection. Ethernet runs that leave the building (to a dock, gate, or outbuilding) can carry induced surge on the data pair. Use surge-protected PoE injectors or surge suppressors rated for outdoor cable runs.
Outdoor cable runs are the most overlooked exposure, a camera on a dock or gate 200 feet from the house is a long antenna for induced surge. Keep runs in conduit, use surge suppression at both ends of long exterior runs, and avoid routing data cable parallel to power cable.
Design for the seasonal property
A lake house that sits empty for weeks changes the power calculus:
- Battery chemistry matters in the cold. Sealed lead-acid UPS batteries lose capacity in unheated spaces. If the head-end lives in an unheated closet or outbuilding, choose lithium-based units rated for the temperature range or keep the equipment in conditioned space.
- Plan for unattended recovery. After an outage, the recorder, switch, and router must all come back without a human. Configure BIOS and device settings to power on after AC restoration, and test it by cutting power at the breaker.
- Watch the battery age. UPS batteries degrade; a unit that ran 60 minutes when new may run 15 after three years. Most manufacturers recommend battery replacement every three to five years. Put it on the maintenance calendar.
Test the whole chain, not just the UPS
An annual test that only unplugs the UPS proves the battery works, not that the system recovers. Run this sequence instead:
- Cut power at the breaker feeding the security circuit and confirm the UPS carries the load
- Confirm recording continues and that you receive an alert from a cellular connection
- Restore power and confirm every device comes back online without manual intervention
- Check the UPS event log for transfer count and battery health
- Replace batteries on schedule regardless of apparent health
Document the results alongside your commissioning records. Power failures are the most common cause of missed footage at remote properties, and the fix is almost always a design or testing gap rather than a hardware failure.
Step 6: Configure Remote Monitoring and Video Storage
Remote security monitoring for lake houses lives or dies on two decisions: where video is stored and how you reach it when you're not there. Get either wrong and you'll have a system that records beautifully and shows you nothing when it matters.
Choose your storage architecture first
There are three patterns, and the right one depends on your uplink more than your camera count.
On-premises (NVR or local server). Video stays on a recorder in the house; internet bandwidth is used only for live viewing and alerts, tolerating a weak uplink.
Cloud-managed. Cameras or a gateway push video to a hosted platform, giving remote access without port forwarding, automatic firmware management, and footage that survives on-site loss.
Hybrid. Record full-resolution continuously on-site and sync motion events plus a rolling window to the cloud.
Do the storage math before you buy drives
Storage depends on camera count, resolution, frame rate, recording mode, and retention days.
A worked example using common 4MP cameras at a typical 4 Mbps bitrate:
- One camera, continuous, 24 hours: about 43 GB per day
- Four cameras, continuous: about 172 GB per day, or roughly 1.2 TB per week
- Four cameras, motion-triggered at an assumed 20 percent duty cycle: about 34 GB per day, or roughly 1 TB per month
That gap is why recording mode matters more than drive size: 30 days of continuous recording on four cameras lands near 5 TB, while motion-triggered lands near 1 TB.
Use surveillance-rated drives, not desktop drives. They're built for 24/7 write cycles and carry workload ratings that desktop drives don't.
Configure remote access securely
Direct port forwarding is the most common mistake in rural installs, it exposes your recorder to the public internet and is a frequent entry point for credential-stuffing attacks. Use one of these instead:
- Vendor cloud relay or P2P service. Easiest to set up, works through carrier-grade NAT common on fixed wireless and cellular. Accept that you're trusting the vendor's relay.
- VPN into the property network. A router-level VPN (WireGuard or OpenVPN) gives you a private tunnel to the recorder. More setup, more control, and it works regardless of which camera brand you chose.
- Reverse proxy with TLS. For technically comfortable owners who want a single hardened entry point.
Whichever you choose, enforce these baseline controls:
- Unique passwords of 16+ characters per device, stored in a password manager
- Two-factor authentication on the vendor account and on the VPN
- Disable unused services (UPnP, Telnet, default admin accounts)
A camera system with weak remote access is a window into your home. An attacker who reaches the recorder can see when the property is empty, map the layout, and watch you arrive. Treat remote access configuration as a security control, not a convenience setting.
Verify remote monitoring end to end
Before you leave the property, test from a cellular connection with Wi-Fi disabled on your phone:
- Open live view on every camera and confirm frame rate and image quality
- Trigger a motion event and confirm the push notification arrives within your expected window
- Play back that event from the cloud copy and from local storage
- Reboot the recorder remotely and confirm it comes back online unattended
- Simulate an uplink outage and confirm the system reconnects and backfills events when the link returns
Document the results with screenshots and timestamps. When something fails six months from now, that record tells you whether it ever worked.
Step 7: Test, Commission, and Establish Maintenance Routines
Installation isn't complete until testing proves everything works, this is where most DIY installations fail. They skip testing, assume it works, then something fails in real use.
Functional testing verifies each camera works:
- View live video from each camera
- Verify focus and exposure are correct
- Confirm field of view matches your plan
Load testing verifies your system handles normal use:
- View multiple cameras simultaneously
- Review one week of recorded video
- Check storage usage rate
Failover testing verifies backup systems work:
- Unplug your primary internet connection; verify cellular backup activates
- Unplug main power; verify UPS keeps system running
- Trigger a false alarm; verify notification and recording
Document all test results, photograph camera views and record system settings. You'll need this for troubleshooting later.
Maintenance routines keep your system working:
- Clean camera lenses monthly (dust and pollen reduce image quality)
- Check cable connections quarterly (corrosion happens at lake properties)
- Review storage usage monthly (catch problems before you run out of space)
A maintenance calendar prevents surprises. Set phone reminders. Do the work. A few minutes monthly saves you from discovering your system failed months ago.
Frequently Asked Questions
How can I monitor a lake house remotely when internet is unreliable?
Use a security camera system with cellular backup and IP cameras designed for low-bandwidth operation. Pair this with a network video recorder that stores footage locally and syncs to cloud storage when connectivity returns. This ensures you capture motion events and can review footage even during outages. Many systems also support push notifications via cellular data so you receive alerts on your phone regardless of Wi-Fi status.
Can security cameras record without Wi-Fi at a lake house?
Yes. IP cameras connected to a local network video recorder (NVR) record continuously to onboard storage without requiring internet. Cellular-enabled systems add remote viewing capability. For complete independence, choose cameras with local storage (SD card slots) and a cellular modem as backup. This architecture means your security camera system operates during power outages and internet failures, with remote monitoring restored once connectivity returns.
What security cameras work best for a lake house without reliable internet?
Look for commercial-grade IP cameras with low-light performance, weatherproof ratings, and PoE power delivery. Pair them with a local NVR that handles video storage onsite. Add a cellular backup modem for remote viewing and alerts. Starlink can also support lake house camera systems if trees and structures don't block the dish. For properties with spotty cell service, hybrid systems combining local recording with intermittent cloud sync provide the best balance of reliability and remote access.
Where should cameras be placed around a lake house for best coverage?
Position cameras at entry points (front door, back door, garage), corners of the building for perimeter coverage, and any blind spots where access is possible. Mount outdoor cameras 8-10 feet high on eaves or posts to capture faces and license plates. Consider field of view, glare from water reflection, and obstruction from trees. Aim for overlapping coverage areas so no approach route goes unwatched. Test each camera's live view during installation to confirm adequate coverage before finalizing mounting.
Remote security monitoring for lake houses requires more planning than typical home security. Your property is isolated. Your internet is unreliable. Your system must work without your physical presence. NewDay Tech designs systems built for these conditions. We handle assessment, installation, and ongoing support so your lake property stays protected, whether you're there or checking in from across the country. Request a consultation to discuss your specific property needs.