
 how-to
Starlink Installation for Rural Ranches: A Step-by-Step Guide
Table of Contents
- What You'll Need Before Installing Starlink on Your Ranch
- Preparing Your Ranch Site for Starlink Installation
- Starlink Dish Placement and Obstructions: Avoiding Signal Loss
- Starlink Mounting Options for Rural Properties
- Installing and Configuring Your Starlink System
- Extending Wi-Fi to Ranch Buildings and Outstructures
- Understanding Starlink Installation Cost and Budget Planning
- Common Installation Mistakes to Avoid
- Frequently Asked Questions
Last Updated: October 8, 2026
What You'll Need Before Installing Starlink on Your Ranch
Before you start the installation process, gather the right equipment and materials. A successful Starlink installation for rural ranches requires careful planning.
You'll need the Starlink kit itself, which includes the satellite dish, router, power supply, and mounting hardware. The dish weighs about 1.5 pounds but needs secure installation. You'll also want a level, drill, wrench set, and weatherproof sealant for outdoor connections.
Beyond the hardware, have these items ready:
- Ethernet cables (25-50 feet depending on distance)
- Outdoor-rated cable conduit or protective tubing
- A sturdy ladder or scaffolding for roof access
- Surge protector or uninterruptible power supply (UPS)
- Smartphone or computer to run the Starlink app during setup
Cable routing is critical. Plan where power and data lines will run from your main building to outstructures. This prevents tripping hazards and protects cables from weather damage.
At NewDay Tech, we recommend having a clear site plan before ordering. Know where your dish will mount, where cables will run, and which buildings need connectivity. This preparation saves hours of frustration during installation.
Preparing Your Ranch Site for Starlink Installation
Site preparation determines whether your Starlink installation for rural ranches succeeds or fails. Poor preparation is the most common reason rural installations underperform.
Start by identifying your clear sky view. Walk around your property and look up. The Starlink dish needs an unobstructed view of the northern sky (for ranches in the northern hemisphere). Trees, barns, silos, and structures block the signal. Even a single tree branch can degrade performance significantly.
Use your smartphone compass to find true north. Stand at potential installation locations and check what's above the horizon in that direction. Look for:
- Trees taller than 30 feet within 100 feet
- Radio towers or large metal structures
- Neighboring buildings or hills
- Power lines and obstacles
Mark your clearest spot with tape or chalk. This becomes your primary installation location.
Check for wind exposure. Ranch properties often sit in open areas with strong winds. Your installation site should be protected from extreme wind if possible, but never sacrifice sky view for wind protection.
Test ground conditions if you're mounting on a pole. Soil type matters. Clay holds anchors better than sandy soil. Rocky ground requires different anchoring methods.
Starlink Dish Placement and Obstructions: Avoiding Signal Loss
The single biggest factor in Starlink performance is dish placement. Getting this right prevents most common problems.
Your Starlink dish needs a clear view of the sky. Obstructions block the signal. Even partial blocking reduces speed and reliability. The dish communicates with satellites moving across the sky, so different angles matter at different times.
Avoid these common obstruction problems:
- Mounting under eaves or overhangs
- Placing near trees that grow taller seasonally
- Installing where snow accumulation is likely
- Positioning near reflective surfaces like water tanks
- Locating below roof peaks or ridgelines
The ideal mounting height is 15-30 feet above ground level. Higher placement generally means better signal. On a ranch, this often means roof mounting or pole mounting above barn height.
Check seasonal changes. A tree that's leafless in winter blocks signal in summer. Plan for growth. A sapling near your dish today becomes a problem in three years.
Use the Starlink app to check obstructions before final installation. The app shows real-time signal strength and identifies problem areas. Mount your dish temporarily, run the app, and check performance. Only then make permanent installation decisions.
Starlink Mounting Options for Rural Properties
Rural ranches offer several mounting options. Each has tradeoffs between stability, access, and aesthetics.
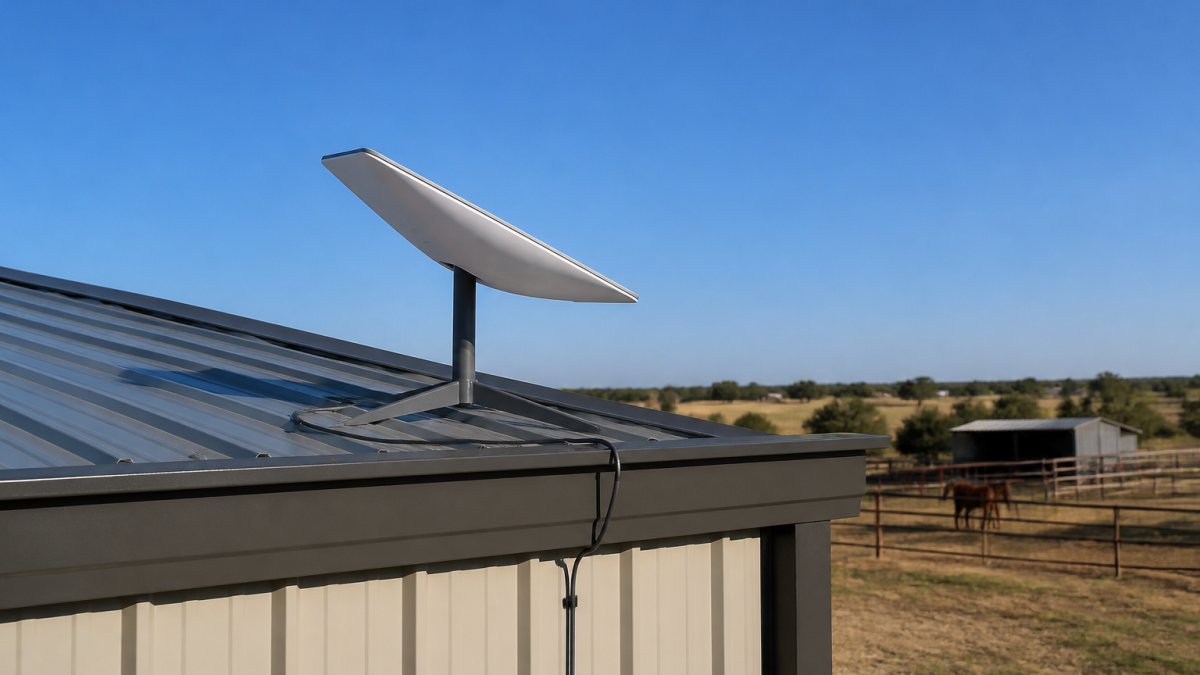
Roof mounting works well for main buildings. It's high, exposed, and uses existing structure. Drill through the roof, seal properly, and route cables through conduit.
Pole mounting gives flexibility. A 20-30 foot pole installed away from buildings provides excellent sky view. Pole mounting works for properties where roofs are too low or too cluttered.
Wall mounting on the side of a building works for secondary locations. Mount as high as practical. Wall mounting is easier than roof work but may sacrifice some sky view.
Chimney mounting uses existing structure but introduces complications. Chimneys move slightly in wind, causing signal disruption. Avoid this unless other options are impossible.
Ground mounting on a mast is the easiest to install but performs worst. Ground-level dishes catch signal reflections from the ground.
For Starlink mounting options for rural properties, consider wind loads. Rural areas experience stronger winds. Your mounting must withstand sustained winds of 40+ mph. Use stainless steel hardware that resists rust.
Cable routing matters as much as dish placement. Run cables through conduit. Protect them from weather, animals, and UV damage. Route cables away from metal structures and power lines.
Installing and Configuring Your Starlink System
Installation follows a logical sequence. Rushing any step causes problems later.
Start with the physical mount. Install your pole, bracket, or roof hardware first. Ensure everything is level and secure before touching the dish. Check that bolts are tight and hardware won't shift.
Mount the dish next. Attach it to your bracket and ensure it's pointing north. The Starlink app guides you through alignment. Point the dish roughly north and tilt it to approximately your latitude angle. The app fine-tunes from there.
Run your cables. Use outdoor-rated Ethernet cable for main runs. Protect cables with conduit. Seal all outdoor connections with weatherproof connectors. Water inside cables causes intermittent failures that are maddening to diagnose.
Connect the power supply indoors. Use a surge protector. Rural areas sometimes experience power fluctuations that damage equipment. A UPS (uninterruptible power supply) protects against brief outages.
Connect the router to the power supply and modem. Use the Starlink app to complete setup. The app walks you through account creation, network naming, and password setup. This process takes 10-15 minutes.
Test your connection. Check speed using the app or a speed-testing website. Typical rural Starlink speeds range from 50-150 Mbps download, depending on location and obstructions. Upload speeds are usually 5-20 Mbps.
Extending Wi-Fi to Ranch Buildings and Outstructures
A single Starlink router won't reach across a large ranch. You need a strategy for extending coverage to barns, sheds, and outbuildings.
Mesh Wi-Fi systems work well for ranches. They use multiple nodes that communicate with each other. Place one node near your main Starlink router and additional nodes in buildings or outdoor areas.
Powerline adapters use your electrical wiring to transmit data. Plug one adapter near your router and another in a distant building. Data travels through the power lines.
Outdoor access points on poles or buildings extend coverage to large areas. These are more expensive but provide the most reliable solution for sprawling properties.
Ethernet runs through conduit offer the best performance. If you're comfortable running cable underground or along structures, hardwired connections beat wireless every time. Bury cables 18 inches deep to protect from equipment and weather.
For extending Wi-Fi to ranch buildings and outstructures, consider your actual needs. Do you need full coverage everywhere, or just in specific work areas? Targeted coverage costs less than whole-property saturation.
Create a site map. Mark your main building, outstructures, work areas, and coverage gaps. Plan your mesh nodes or access points based on this map. Test coverage before making permanent installations.
Understanding Starlink Installation Cost and Budget Planning
Starlink installation for rural ranches involves multiple cost categories. Understanding each helps you budget properly.
The Starlink equipment itself is a one-time purchase. Monthly service costs depend on your plan choice. Check NewDay Tech's pricing page for current rates and available service tiers.
Installation labor varies widely. DIY installation saves money but requires technical confidence. Professional installation through providers like NewDay Tech ensures proper setup and ongoing support. Installation costs depend on your property size and complexity.
Mounting hardware and materials add up. Poles, brackets, conduit, sealant, and fasteners cost money. Budget for quality outdoor-rated materials. Cheap hardware fails in rural weather conditions.
Cable runs to outbuildings require materials and potentially labor. Long runs need quality Ethernet cable and conduit. Underground runs cost more than overhead runs but look better and last longer.
Backup power systems (UPS units) protect your equipment. These aren't mandatory but are smart insurance in areas with unreliable power.
Mesh Wi-Fi systems or access points for coverage extension represent additional investment. A single mesh node costs less than a professional access point, but you might need multiple nodes.
Factor in ongoing support. NewDay Tech offers support plans that cover equipment issues, signal problems, and system optimization. Support plans provide peace of mind and faster problem resolution.
Common Installation Mistakes to Avoid
Learning from others' mistakes saves time, money, and frustration.
The biggest mistake is poor obstruction planning. Installers see a location that looks clear and mount the dish without testing.
Inadequate cable protection ruins equipment. Cables exposed to sun, rain, and rodents fail within months. Use quality outdoor conduit. Seal connections properly. Protect cables like they're valuable, because they are.
Improper grounding causes electrical problems. Your Starlink system should be grounded like any outdoor electrical equipment. Poor grounding creates shock hazards and attracts lightning damage.
Skipping the surge protector invites trouble. Rural power can be unstable. Lightning strikes, power fluctuations, and grid issues damage unprotected equipment.
Mounting too low sacrifices signal quality. Ground-level or low-roof installations perform worse than high mounts. Spend the effort to mount high.
Ignoring wind loads causes mounting failure. Rural ranches experience serious wind. Your mounting must withstand it. Use proper bracing and quality hardware.
Poor cable routing creates tripping hazards and signal issues. Route cables neatly. Use conduit. Keep them away from power lines and metal structures.
Skipping professional support leaves you stranded when problems arise. NewDay Tech's experience with Starlink installation for rural ranches prevents most common issues. Professional guidance costs less than fixing mistakes later.
Starlink brings reliable internet to remote ranches, but only with proper installation. The process demands attention to detail and patience.
Frequently Asked Questions
Where should you install a Starlink dish on a ranch?
Install your Starlink dish on the highest point of your property with a clear view of the northern sky, typically a roofline, pole mount, or tower. Avoid placement near trees, barn structures, or other obstructions that block the signal path. Test the location using Starlink's app obstruction tool before finalizing the mount. For ranches with multiple buildings, consider a centralized location that maximizes signal reach across your property.
Can trees and buildings interfere with Starlink service on my ranch?
Yes. Trees and structures block Starlink's signal, especially at the edges of your property. Even partial obstructions, branches, roof overhangs, or distant tree lines, can reduce speed and reliability. The app's obstruction map shows exactly where signal loss occurs. If your ideal mount location has obstructions, you may need to adjust the dish position, trim vegetation, or mount higher to clear the interference.
How do you extend Starlink Wi-Fi across a large ranch property?
Starlink's built-in Wi-Fi reaches roughly 100-150 feet depending on obstacles. For barns, outbuildings, or distant areas, use mesh Wi-Fi systems, Wi-Fi extenders, or dedicated access points connected via ethernet cable runs. Burying or protecting outdoor cables prevents weather damage. Professional installation ensures proper placement and cable management, reducing dead zones and improving coverage consistency across your entire property.
What factors affect Starlink installation cost for a ranch?
Installation cost depends on dish mounting complexity, cable routing distance, site preparation needs, and whether you extend Wi-Fi to multiple buildings. Professional installation, weather protection, and integration with existing systems add to the total investment. Visit NewDay Tech's pricing page for current quotes and to request a free consultation tailored to your specific ranch layout and connectivity needs.